How To Price For Profit At Wholesale

How To Price For Profit At Wholesale by Passion Maker Project

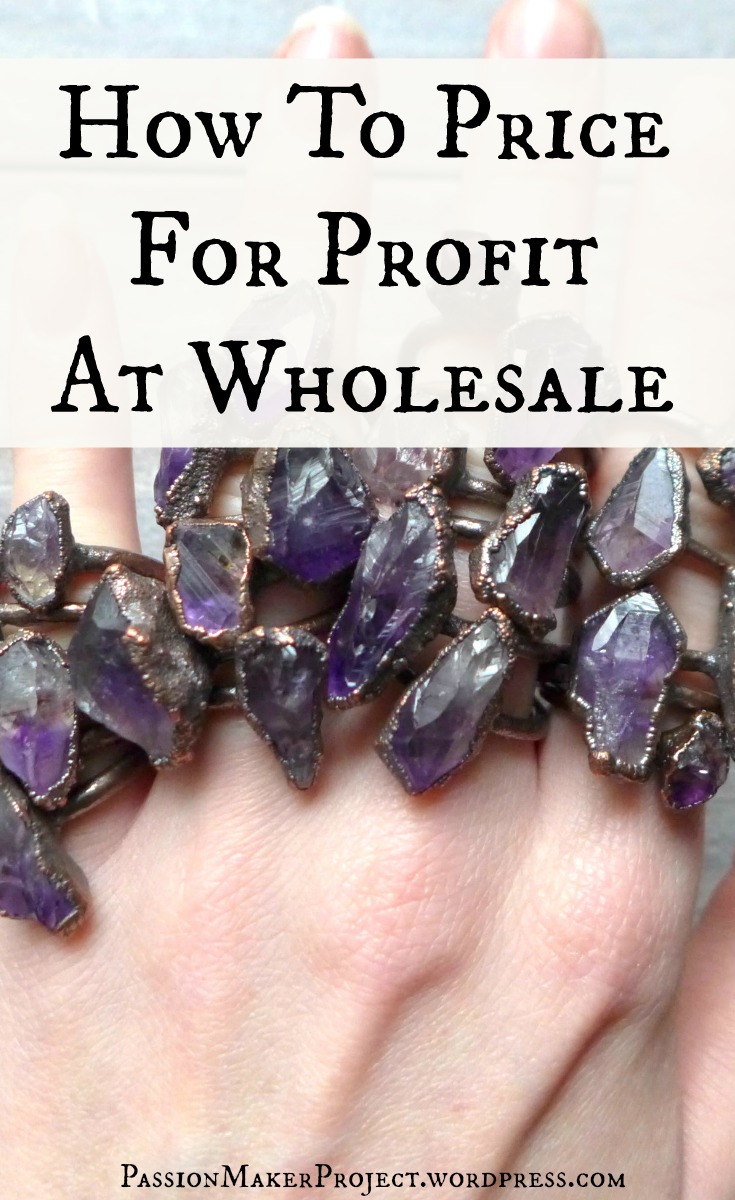
There’s this HUGE epidemic with Etsy sellers and underpricing so I’m going to walk you through all the elements you need to account for when pricing your items. It will vary from craft to craft but you must account for these simple basics to pricing so you don’t look at wholesale as “losing 50%.”

How To Price For Profit At Wholesale by Passion Maker Project

1. Cost of Goods Sold

The first thing you need to account for in pricing is the cost of materials. How much did you spend on those beads, wire, solder, etc.? Keep a record of the cost of the supplies you buy. If you bought a bag of 6 gemstone beads for $6 and you use 2 in a project then you know you spent $2 on gemstone beads for that project. Do the same for any other materials you use in each project then add it up.

2. Cost of Overhead

This includes everything from studio rent and cost of gas to get there to invested machinery and office supplies. Here are just a few things that go under your overhead costs; office equipment like that Macbook you bought last year, big machinery you use in your process, for example, the tumbler you use to polish your metal components, the tools you use over and over on multiple pieces, power supplies, that subscription you have with your email service provider, advertising and promotions, etc.

A lot of people get tripped up on this part. They think they don’t have to account for these purchases because they can be used over and over. That’s where you sum it up into a percentage cost. Myself personally, I add 10% to the cost of making a piece to account for my overhead. I don’t have a separate studio to pay for so my percentage would be lower than someone who does have that.

You have to think “what is my computer went out?” You would have to grab from your labor costs in order to get a new one if you weren’t accounting for overhead in your pricing structure. Then you might not be able to get groceries that month. We don’t want to do that if we’re making a living doing this.

This percentage will vary depending on how much stuff you own and investments you made in equipment. Your percentage will grow the more you upgrade and invest in new tools and office equipment.

3. Cost of Labor

This cost will have a bunch of factors you need to think about to determine what that cost should be. This will depend on the cost of living in your area and they type of life you live now and the life you want to live in the future. What are you building toward?

Think about where you want to live, the things you want to own, vacations you want to go on, the groceries you want to buy. There’s so much you need to consider. What is it going to cost you to live the life you want?

After all, we are all selling the things we love to make in order to be our own boss to live the life we want, right? Start with the end goal and figure out how much it’s going to cost to live that life. Then determine the hourly rate you need to make in order to fulfill that dream.

4. Profit

Lastly, but most important, how much profit do you want to make? This is not the same cost of your labor. It begs repeating, labor is not profit! Profit is the money that you get to use on whatever you want outside of business. This is the reward you get for all your hard work, go out for dinner, go to a concert, buy that dress you’ve been wanting.

Profit is extremely important. We all want to be profitable, that’s the whole reason we’re in business, right? Profit is also going to be a percentage cost. I personally give myself 5% profit. As my skill, experience, and “tool shed” grow I will increase that percentage accordingly.

Once you have factored in all these costs, that is your wholesale price. A lot of people, and I do mean A LOT, use this price as their end retail price. Then they complain when when retailers want to sell their products in their boutiques because they think they’re going to “lose 50%.” And yes, technically, if you’re using a wholesale price as retail and then try to sell at wholesale, you will most definitely be losing money.

That’s why it’s so important to double that price to get your retail price. I like to times my wholesale number by 2. Others like to  do 2.5. And THAT’S the end number of what you need to be selling your pieces at.


This all might sound like it’s getting to be too expensive but trust me, once you start running the numbers you’ll hopefully see that you can absolutely sell your pieces at the true retail cost. But it takes a lot of work to get your customers to see that that price is worth it. You have to do this through your photography, your copywriting, your branding, your collection and your story.

These are all subjects for another day but hopefully you are able to see how important it is for you to price for profit at wholesale.


3 Steps To A Successful Sale

3 Steps To A Successful Sale by Passion Maker Project

Hosting a sale can bring in a lot of extra money fast as long as you do it right. It’s important to not get your customers accustomed to expecting a sale from you.

When you host a sale every week, or even every month, you train your customers to never buy at your full retail price. Why would they buy at full price when they know if they wait a couple weeks they can get it on sale?

In my jewelry business I host 2 sales a year. But when I host one I make sure to give a generous 30%-40% off. But, by only hosting a sale twice  a year my customers often buy at full price. They don’t want to wait 5-6 months for a sale because that item may be gone.

I don’t even host a sale on Black Friday or Cyber Monday. My philosophy is 1) I’m a small business so I’m not going to fight the noise against big corporations. 2) It’s the most shopped days out of the year. People are shopping anyways so chances are I’ll get some decent sales. I owe this philosophy to jeweler and small business owner Megan Auman. (Definitely check her out!).

So, how to host a successful sale? Let’s dive right into it. These are things I’ve done recently in my own business with huge success.

3 Steps To A Successful Sale by Passion Maker Project


1. Build Anticipation

The first thing you want to do, and it’s the most important step, is to build anticipation. I like to start prepping everyone for the sale a week before the sale goes live.

It’s not too long to where they will loss anticipation but it gives me enough time to build that excitement.

I will post about the sale on all my social media channels once or twice per day throughout the week. Then throughout the sale. I email my list subscribers every Tuesday (you do have one of those right?) but I will email them a second time right before the sale starts. Which leads me into #2.

2. Create Exclusivity

I create exclusivity by allowing my email subscribers to shop the sale for 6 hours before it’s released to the public. (Also an idea I snagged from Megan Auman. She really knows her stuff.)

Not only does this create exclusivity, it will also get you a lot of new email signups. Plus you’ll make your subscribers feel like the VIP’s that they are. It’s a win win!

there are many other ways to build exclusivity. You can do free shipping for the first 5 customers. You can give away a free gift with purchase for the first 10 customers. You can also host a giveaway and add the names of the first x amount of customers.

This gives people incentive to buy something during your sale. Or, even if you’re not hosting a sale, these ideas can be a great way to create incentive to buy.

3. Host The Sale

Now that you’ve done the work to prep your followers and customers for the big sale it’s time to go live! I like to host sales for 2-4 days. I wouldn’t host one for longer than a week just because it starts to get old.

Trying to keep people excited about  sale for more than a week is hard.  You can create extra excitement if, on the last day of your sale, you let everyone know that you are going to extend the sale for another day. That usually allows people an extra day in case they missed it prior.

Like I mentioned before, I like to create a good sale with 30% – 40% off. I don’t advise you to go lower than 50% off unless you can afford to and still make profit.

The way my pricing is set up I’m able to go as low as 50%, which is my wholesale price, and still make my bit of profit. Anything lower than that and I’m just losing money.

And remember to only use this sparingly so your customers don’t only buy when you have a sale.

I hope this simple 3 step process helped you to host a successful sale. Please comment below if you have used this process and got great results. Or even is it didn’t work for you. Let me know!

As always, if you liked this post please subscribe.

5 Reasons Why You Need A Cohesive Brand

5 Reasons Why You Need A Cohesive Brand by Passion Maker Project

When I was running my first jewelry business I didn’t even know what branding was. I knew of brands but I didn’t know what went into having an actual brand. After learning about the importance of branding my business I knew I needed to change, a lot!

I immediately started to map out how I wanted to look to my customers. I started to think about the perceived value it would add, and ultimately, how much it would change my business.

I came to the conclusion that the aesthetic of my jewelry and the message I was putting out at the time would not match my new found vision for my business. (Sometimes I look back and say “what the hell was I thinking?”) I had to change so much that I decided to just close up shop, after 2 years, and start all over with a new one.

You probably don’t need to do anything that drastic, let’s face it, my last shop was a hobby turned business. I had some other issues I needed to work out, like pricing my work at the value it’s worth. But that’s for another post.

Today, I want to share 5  important reasons why you should have a cohesive brand.

5 Reasons Why You Need A Cohesive Brand by Passion Maker Project

1. It Builds Trust

It takes someone 50 milliseconds to make their first judgments about your website. That’s not a lot of time at all. Having a nice looking brand aesthetic can help you establish credibility which leads to people trusting you, and ultimately, trusting what you have to offer.

I don’t know about you but when I land on a website and I see a nicely curated mix of color in just the right amount in just the right areas I feel like I can trust what they are telling me. If they care that much about the design of their website then they must care about the product or service they are providing me.

2. People Will Want To Share

Think about the last time you shared something. It could’ve been a Facebook post of a funny cat video (I wouldn’t know anything about that), an email with a 40% off coupon for that paint set your friend’s been dying to get, something you seen at the coffee shop yesterday. Now think about why you shared that.

The 2 biggest reasons why anyone shares anything is to bring value to the person they’re sharing it with or to appear cool and “in the know.”

Think about your ideal customer. What sort of things are they into? What are their favorite colors and shapes? What type of words do they use? This takes a bit of research but when you have a strong brand that resonates, your idea customer will want to share.

3. You Will Be Remembered

What’s the first thing that pops in your head when I say McDonald’s? You’re probably seeing those world famous golden arches, right? That’s because they’ve been using them since they very beginning. And although their brand has evolved over the years, the visual aesthetics and message stay the same.

When you choose your colors, fonts, symbols, even your writing voice, early on and stick with those same elements you will start to leave an imprint in people’s minds. They will associate those elements with your brand so when they see your graphics floating around on social media they’ll know exactly who it is even if your logo isn’t on it.

4. You Will Have A Consistent Voice

I was reading an email from Lauren Vanessa Zink at Tiny Happy Empire last night that was talking about how our voice becomes censored being in a corporate job, or other, for some time. We often have to watch what we say because, quite frankly, we could get fired. But once you become your own boss there are no rules anymore. You have to break out of the mindset that it’s not OK to have an opinion.

A lot of the time you are intertwined with your brand. So be yourself, crack those jokes, curse if that’s how you normally speak. Trust me, you’ll attract your Tribe faster and your Tribe will love it. If they don’t, than that just means they aren’t your ideal customer so you don’t want them reading what you write anyways. Sayonara! You’re not for me.

5. It Will Help You Build Your Tribe

This is the most important reason why you should be building a cohesive brand. It’s to build your Tribe, your customers, whatever you want to call them. These are the people who will continue coming back.

You don’t have to appeal to everyone, just the right ones. When you create die-hard fans who LOVE your brand, they’ll tell all their friends about you. ‘Word of mouth’ is still the number one form of marketing above email marketing.

Your brand has to speak to your ideal customer, so much that they’ll want to buy immediately. Your brand does not stop after the sale either. You’re brand must continue to stay top-of-mind after the sale.


So ask yourself, what experience is your customer having throughout the entire buying process?

From finding you on social media or through advertising > browsing your website > reading your blog post > finding an item they love > engaging with your customer service > going through the checkout process > getting their package in the mail > using your product, etc., etc.

Then imagine how they’ll explain your business to their friends. What words are they using to describe your business to other people? That’s the root of it all, the beginning. It’s where you start your branding efforts. That’s the core of how you should be determining your brand’s look and feel.

* You may be wondering “why the hell should I listen to this chick? Her website is totally bland.” Well, this is more of a do-what-I-say-not-as-I-d0 moment. Because I just started this site as a side project and not too sure who my reader is just yet. But do have a look at my jewelry brand website. Also check out my About page. I’ve taken many courses on many different business topics across the board. 

Stay tuned and subscribe for more creative business tips. I love talking about branding and sharing all the things I’ve learned on my journey of running a small creative business. I will be going more in depth about how to create a brand style guide you will actually use.

Please subscribe and follow.

How To Set Up Your Own Etsy Shop FREE

How to Setup Your Own Etsy Shop FREE!

If you’ve been thinking about setting up an online shop for your beautiful creations, vintage finds or, if you sell crystals or other supplies, & don’t know which platform is right for you then keep reading. I have always used Etsy so that is the platform I will talk about & hopefully you find it’s the right fit for you & your future small business!


How To Set Up Your Own Etsy Shop FREE

Etsy rewards it’s sellers by providing them with their own personal invite link that they can share to bring on new friends to open a shop on Etsy. This link enables that both parties earn 40 free listings if & when the invitee opens the shop up for business.

Then, say you, open your shop through my invite link you will then have your own invite link to share & continue earning free listings while the friends who you invite also gets free listings. (I once went almost a whole year without having to pay any listing fees. I was an Etsy shop slinger, you could say, haha!)


Setting You Up For Success!

Your next step after signing up & before you officially open for business you want to tell the world what you have to offer! You also want to set up your shop’s policies so you have a safe & stress free business.

About Me Page

Let people know what you have to offer & how it will enrich their lives! How will your product make your customers lives better & easier? Share that with them. I don’t want to go too deep on these topics because it will take me way off subject. But definitely find shops that you love & check out their About page for inspiration. Think about why you buy from other shops & create an About Me page that will send your customers running for their wallet!

Also, in your About section, you can add up to 5 photos. You want to fill these with photos that show people your process. Show a photo of you in your studio, or of you creating your item or packaging it. Even if you show just your hands I think customer can really resonate with that. I only have one photo on mine so I don’t really follow my own advice here but I kind of like the one photo, sort of like a cover photo. You can see my shop’s About Me page here.

Profile Page

You’re also going to have a profile page. I like to keep it all about my customer there too. I do introduce myself but I always talk about my products & the benefits first before I introduce myself. You can also include your email sign up link there as well. I try to include that link everywhere I can, lol. Again. that’s another topic.

Shop Policies

Lastly for the Setting You Up For Success section is your Shop’s Policies. Yes, I know, it’s so boring, & wouldn’t you just like to skip that part. Absolutely NOT! This part of your shop will save your booty from time to time. Make it clear what you allow/accept & what you do not. If you don’t allow returns make sure you include that in your policies (although you should also include that in all your product listings because most places allow returns & you don’t want to have an irate customer who didn’t read your entire shop policies).

Try to have a friendly voice when writing your policies. If you have a very playful, cheery voice in your About section & on your listings then let that flow on through to your policies. You don’t have to sound too serious.

Make sure that you account for everything, Lost/damaged packages. Broken items, etc. Satisfy your customer any way you can even if it’s their fault. There’s nothing like a satisfied customer because word of mouth is still the best form of marketing.


     "Work That Hustle" Print by Mad Kitty Media on Etsy

     “Work That Hustle” Print by Mad Kitty Media on Etsy


Taking Payments

While you are setting up your shop you need to think about how you will take payments from customers & also how YOU will get paid! That’s always the fun part.

How do you want your Customers to pay you?

You have the option to accept credit/debit cards, Paypal, money orders, personal checks & Etsy gift cards. You don’t have to accept all these payments, you can just accept credit/debit or just Paypal, etc.

How do You want to get paid?

You will need your bank account information & Paypal info, if you have Paypal. A lot of people like to pay using Paypal because they like to keep their funds separate from their bank account so definitely think about signing up to Paypal. But it’s not dire to have one & your bank account will suffice.


Etsy Fees

Now, when you sign up through my link at the top & bottom of this post you are able to set up your entire shop & list your first 40 items absolutely free. You don’t have to pay anything until you make that first sale.

Listing Fee

After you use up all your 40 free listings (& if you haven’t acquired more through getting others to sign up) then the regular Etsy listing fee is $0.20. Not too bad. You can definitely work that into your pricing if you don’t see a future in Etsy shop slinging, like myself.

Seller Fee

Next, there is a seller’s fee. This doesn’t come into play until you have sold your first item & every item thereafter. Etsy takes a small percentage of 3.5%. To put that into perspective, if you’re selling a $50 item then Etsy would only take $1.75. You can also work that into your pricing so you’re basically accounting for everything & making all the money you need to run a successful business, right?

So, I’m still staying true to my word that you can set up, list 40 items & open your shop completely FREE! You don’t have to pay a cent until you sell something. That’s fair, right? After all, Etsy provides so much traffic & they are integrated with Google so you will often find your Etsy shop/items through Google search! Check out SEO to make your listings more crawlable by search engines. (Another subject I hope to tackle in the future.)

Monthly Etsy Bill

I also want to go over your Etsy bill. All your listing fees, sellers fees & shipping label purchases (which I’ll go over in a minute) they all get collected in your Shop Bill account where you can pay one monthly fee instead of having to pay right away. I personally think it’s a cool feature. That way you will have your money from selling your first item already in your bank account before you have to pay your Etsy bill, after that is all profits! Yay!


Gettin’ Paid in the Shade, Baby!

Next I’ll walk you through how you will get your money & how long it will take to show up in your bank account.

Direct Checkout (Credit/Debit Cards)

During your first few sales Etsy will hold your money in your Shop Payment Account for a few days, I can’t remember exactly how long but I know it’s about 4-5 days before it becomes available for deposit. After you start getting more sales under your belt Etsy will start to allow you to deposit the very next or same day.

Now, there’s a little trick with this. Once your money starts becoming available to you, there’s a button in your Shop Payment Account that’s labeled Select Earlier Deposit. You want to click that button as soon as you see your money is available for deposit otherwise Etsy will just hold it there until the next available Monday before automatically depositing it into your bank account.

Depending on which bank you use it can take anywhere up to a day or two from the moment your money leaves Etsy to it showing up & being available in your bank account. So don’t worry if you don’t see your money in either Etsy or your bank account within this time frame. For me, after my money leaves Etsy it doesn’t show up in my bank account until the next day. So it’s like my money is just floating in space for the time being & I’m thinking “where is my money…?” That’s where it’s at, just in case you were wondering.

Oh, one more thing. Etsy always deposits your money around 6PM EST on the day it’s scheduled to deposit.

Paypal

Now, if someone checks out using Paypal (this is for those who have a Paypal account or chooses to open one) then the money goes directly to your Paypal account as soon as they checkout. But you have to remember that Paypal also takes a small fee of 2.9%, so a little less than Etsy. But I guess it’s a the price you pay to get your money immediately. That is something you can also work into your pricing.

Money Orders

Someone will choose the Money Order payment option at checkout (if you offer that payment option) then that item moves to your Sold Items. They are then sent your address where they will send the money order. DO NOT send your item until you have received the money order & have taken it to your bank & made sure its legit & you have the money in your account. After that is approved then you can send out the item. Don’t worry about the wait, anyone who pays with a money order knows that it will take longer for them to receive the item.

Personal Checks

This one is basically the same as money orders. Here is an Etsy forum that goes deeper on this topic. That’s another great thing about Etsy, is all the help you can get from Etsy Admins & Sellers!

Etsy Gift Cards

Etsy gift card payments (you first have to add that as a payment option in your Accepted Payments section in order for people to use gift cards in your shop). The money you get from a gift card will act the same as if someone paid direct checkout & the money will go to your Shop Payment Account.

Etsy E-Readers

This is a fairly new feature that Etsy just developed. They offer you a free e-reader that you attach to your mobile device & with the Etsy seller app you can take payments in person! This is great for craft fairs, festivals or just at home with friends & family who want to buy from you. You can also take cash, I believe, & just enter it into your app. I don’t have one (cause I’m an introvert/homebody so I never leave the house, haha!) so here is a run down on the Etsy E-Readers.


     "Girl Boss" Coffee Mug by Pretty Collected on Etsy

     “Girl Boss” Coffee Mug by Pretty Collected on Etsy


Shipping

So, what are you going to do once you make that first sale? Why, you print & ship!  Etsy makes it super easy to print your own shipping labels at home.

Figure Out Your Shipping Costs

First you want to figure out what your shipping costs will be. It’s fairly simple to do, just goto USPS.com or whatever is the appropriate shipping company is for your country & calculate costs through weight & packages size along with the shipping method you’ll be using. Then you add that price to all your Etsy listings.

Printing Labels On Etsy

Once you receive your first order that item goes into your Sold Items section of your shop. You are able to see which payment method they used, you’re able to contact them for any additional info & you are also provided with their email.

There you can see a button labeled Print Shipping Label. Click that button & enter your weight, which shipping method you will be using, i.e., First Class, Priority, Express, etc. You’re also going to choose the type of package you’ll be shipping the item in then Etsy calculates your shipping cost & voila! Your label will be sent to your printer where you can print it out, create your pretty package & ship.

International Shipping Labels

You have the option to take on international buyers or not. I’ve heard from a lot of people that they don’t because they think it may be too difficult or too expensive. Turns out, it’s very simple & almost the same as shipping domestic! (Well, I can only speak for those shipping small items, like myself.)

I personally like to use Paypal for my international shipping labels simply because it’s way cheaper than Etsy. I don’t know how or why but they are just able to offer cheaper international shipping costs. For instance, a 1oz large envelope First Class shipping label on Etsy would cost me about $7 but on Paypal it only cost me $2.38 to $4 depending on the country I’m shipping to! Then, I’m able to pass those savings onto my international buyers & I notice I get way more now. Win win!

Now, I still take international buyers on Etsy but I just don’t print their shipping label there. Once they checkout on Etsy I am provided with their address so I just go over to Paypal, enter their info & pay/print my label from there. Then I go back to Etsy & mark the item as shipped & enter the custom forms number. It’s very simple.

When you are creating an international label you will need to enter what they item is that you’re shipping, the quantity, value, etc. That’s basically the only extra step there is to creating an international shipping label. You want to make sure that you write in your policies that the buyer is responsible for any customs shipping tax. Every country is different & usually they already know what they need to do, if they even have to pay a tax fee.

You can also take your packages up to the post office then enter all the tracking info for each packaging into your Etsy sales so your buyers have their tracking information.


               Don't YOU want to sell on Etsy too?

               Don’t YOU want to sell on Etsy too?


Etsy Comminuty & Help

Etsy has an amazing community of sellers & admins who are there for you every step of the way!

Etsy Forums

Etsy has loads of forums that talk about everything from copwriting to product photography from shipping to marketing! You can start your own disscusion or ask quesions. You can access these forums without having a shop, too! Find these forum here.

Etsy Blog

Etsy even has a blog! Again, you can read about anything in their blog. It’s been so helpful for me & I continue to find a lot of inspration from it. They even feature shops from time to time so try your hand at pitching to them for a feature.

Etsy Teams

You can also join amazing Etsy teams. There is a team for just about every genre & topic out there. You can also create your own team!

Etsy Success Newsletter

Sign up for their free email newsletter & get the best tips & tricks to improving your Etsy shop success!

Etsy Seller Handbook

Check out their seller handbook for more tips on selling your items on Etsy. Remember, Etsy is based onYOUR success! They thrive when you thrive!

And So Much More!

I could go on & on! There are so many things you can do & find on Etsy to help you be the best you can be. So check them out, even if you don’t want to set up a shop with them. They still have amazing tips that you can use to your benefit!


So what are you waiting for?! Sign up now & start creating the life you’ve always dreamed of! One with freedom! Be your own boss! #GirlBoss #Entreprenuer #GetOnYourGrinde #EverydayImHustlin You get the picture.


Congratulations! You Are Now Open For Business

That should have covered everything you need to know to get started on creating & opening your Etsy shop! The rest is magic! Let me know if you have any questions in the comments below. If you do decide that Etsy is the right platform & you do end up opening your shop please share it in the comments as well! I’d love to check it out!

Much love & success!

450 Sales in the First Three Months on Etsy

Great read on being a conscious seller, not just in it for the cash! =)

Handmade Success

I have a new shop on Etsy, and I love learning the business side of retail as much as I love making the products! ♥ I posted this thread on Etsy twice, but it’s been closed both times. Etsy Admin doesn’t like the topic: Be Wary When One Customer Finds You Too Much (see below). That’s not intended to hurt any feelings, to me, it’s just good business sense. This article has been re-published at Handmadeology as well.

I’ve kept close watch of what works and what doesn’t since I started. Here’s what I know for sure:

Give Stuff Away. If you check out my shop, it will come as no surprise to you that I’m a real believer in karma. Share your product. If anyone I know personally shows interest in my product, they get a bracelet. I appreciate support in all forms.  Before I started selling anything, I…

View original post 1,699 more words

Freedom Method Challenge hosted by Flourish & Thrive Academy

Copper Wire Wrapped Quartz Crystal Point

I’m entering a 10 day series of Instagram challenges hosted by Flourish & Thrive Academy to learn how to create FREEDOM in my business so I can focus more on doing the things I love! This is my #FREEDOMMethodChallenge. Come Follow me on Instagram here & Follow Flourish & Thrive here.

Setting my Own Schedule
Freedom Method Challenge day 1

#FREEDOMMethodChallenge Day 1 » What does freedom mean to you?
>x<>x<>x<>x<>x<>x<>x<>x<>x<>x<>x<
Freedom in my life looks like seeing my own schedule! Owning & running my own business to nee dies NOT mean waking up whenever I want d staying in my PJ’s all day. No way, not this business woman. I set a strick schedule for myself during the week, waking up at 6AM Monday-Friday. On the weekend, though, is a while other story, heehe! On Saturday’s I wake up around 9AM-11AM & I like to work as I do during the week. On Sundays I wake around the same tone but I like to take sista for myself & so whatever I want (however, it usually consist on making my business better cause that’s what I truly love to do!). I love the freedom of bring able to make all the decisions same day & now having to go through 20 people to just use the color purple in a design. That to me is what FREEDOM looks like!

Practicing Meditation
Freedom Method Challenge Day 2

#FREEDOMMethodChallenge Day 2 – If you were able to design jewelry purely because it was your passion, what would an average day in your life look like?
>x<>x<>x<>x<>x<>x<>x<>x<>x<>x<>x<
My days are filled with tons of things I need to do. I have to-do lists for everyday. If time & money were no issue & I just designed jewelry only cause its my passion I would start practicing mediation & yoga. It would be nice to sit for 30 minutes to an hour & just BE in the moment. Letting go of any thought that comes to mind. Its hard to do that knowing I have to ship these packages or finish this order but I’m going to make it a priority to learn to let go. I want to learn yoga to form a better relationship between my mind, body & soul. I’d love to be more flexible too, of course, heehe! Maybe in the morning, from 6:30AM – 7AM, I will dedicate to practicing meditation & yoga. Since I wake up at 6AM that will give me 30 mins. to wake up. You can’t accomplish a goal if you don’t have a plan, right? So that’s what I’m going to do, now you all have to hold me to it! 😉 Other tid bits; grow an herb & succulent garden, explore nature, go mushroom hunting, play with my kitty more, read more physical books during the day instead of reading them on my phone at night before bed. This would be a day in my life… xoxo

Morning Routine
Freedom Method Challenge Day 3

#FREEDOMMethodChallenge Day 3 – Map out your perfect morning routine!
>x<>x<>x<>x<>x<>x<>x<>x<>x<>x<>x<
My perfect morning routine goes as follows… I wake up at 6AM Mon.-Fri. My boyfriend leaves at 6AM so I get a quick kiss before he leaves. Then I reflect on the dreams I just woke from & try to interpret how it reflects my life. Then I like to get a glass of grapefruit or OJ along with some water. When I drink water before my coffee I feel more rejuvenated & fresh! Then I grab my cuppa coffee & have some yogurt &/or toast to get in my morning fiber. Ill say hi & cuddle with my kitty if he’s home. My next assignment is to check my emails, Facebook messages & social media notifications. I’m what you’d call an “early bird” so I love connecting with everyone in the morning. Next I like to write down my to-do list (if I didn’t write it the night before). By this time I’m ready to start my day so I make my bed, get dressed & tame my crazy dreadlocks, heehe! I feel more confident when I get dressed even though I may not see anyone our go anywhere. Staying in PJ’s is not an option for me. After all this is when I start in my days tasks & projects. I’m hoping to add providing yoga & meditation in there soon! As long as I keep my mine on it & surround myself with reminders & motivations!

Business Stress
Freedom Method Challenge Day 4

#FREEDOMMethodChallenge Day 4 – Get out of your work environment & write down your biggest areas of overwhelm in your business.
>x<>x<>x<>x<>x<>x<>x<>x<>x<>x<>x<
My biggest area of overwhelm is definitely time management. I often take on too many projects & give deadlines that are unrealistic. I have to realize that I can’t do it all in one day. I need to spread out my tasks so I don’t feel un-accomplished when I don’t complete 20 things in a day. I wear a lot of hats since I do everything from designing to shipping, marketing to website building. Another area of overwhelm would be trying to keep my jewelry consistent while keeping things fresh & new. I think the solution for that would be creating different collections of jewelry so I can create different designs but keep it cohesive with my other collections.

Rejuvenate
Freedom Method Challenge Day 6

#FREEDOMMethodChallenge Day 6 – How do you rejuvenate?
>x<>x<>x<>x<>x<>x<>x<>x<>x<>x<>x<
I like to have a nice fresh grapefruit, yogurt or any kind of fruit for refreshment & rejuvenation. Eating healthy & drinking lots of water feels very rejuvenating for me. Soaking up some sunshine is also a great way to rejuvenate! It’s a nice way to take a break from working on something really hard. I feel I think more clearly & I’m more at peace. Plus you can’t beat the long term benefits! I’m happy, healthy, productive & rejuvenated! 🙂

Production Process
Freedom Method Challenge Day 7

#FREEDOMMethodChallenge Day 7 – Show us your production process!
>x<>x<>x<>x<>x<>x<>x<>x<>x<>x<>x<
My production process starts at a spark of inspiration! Usually it’s a crystal that inspires me to make, say a necklace. Designing can take anywhere from 30mins. (if it’s a thin bracelet) to 3 hours, sometimes more! Then photographing comes next & I must wait for the right lighting outside (cloudy or early morning preferred). Ill snap about 20 photos in all angles before narrowing it down to just 5 to use for my Etsy listing. Listing a single item can take up to one hour. I must write out a great copy that explains how beautiful the piece is since we all know that photos never do justice! After that necklace sells it’s time to write a ‘thank you’ email then print the suing label. Then I head off to the kitchen table to spread out for shipping. I will bubble wrap the piece(s), then wrap in colored tissue paper (that matches my brand color palette), then ill wrap in some Kraft paper, add a cute bow using scrap hemp strings. I gift wrap all my pieces, no extra charge, so it’s ready for you to gift to a friend or to yourself! I always hand write a ‘thank you’ note, add a few business cards, package it up & stick it in my mailbox. Ill send a follow up email sometimes just to make sure the customer received everything in good condition. And that leads to the 5-star review!

Creative Process
Freedom Method Challenge Day 8

#FREEDOMMethodChallenge Day 8 – Design something new!
>x<>x<>x<>x<>x<>x<>x<>x<>x<>x<>x<
I could go on & on about why I love to design but ill keep it short & sweet. I love to design because it fills every ounce of my soul with happiness! I love that feeling of being a part of something much greater than yourself! Lately I’ve been getting into more copper metal work from electroforming to working with copper sheet cut outs. Today I wanted to try out some wire wrapping cause I have these cute crystal points I want to use to make some tassel necklaces with. YouTube is my best friend for learning anything new & that’s where I just learned this cute wire “basket” weave for one of my points! Its not the best, obviously I’m dominate in macrame but its cute & raw & perfect to me! I love that split second burst of excitement right before your about to finish something amazing! It makes me feel like a little girl again, that feeling is priceless!

Designing Process
Freedom Method Challenge Day 8

#FREEDOMMethodChallenge Day 8 – Commit to automating one area of your business.
>x<>x<>x<>x<>x<>x<>x<>x<>x<>x<>x<
I am more FREE when I jot down my schedule for everyday. But one thing I did today was schedule evening posts for all next week & ill continue to do this every Sunday. I’m an early bird so connecting & creating morning posts comes naturally but when evening comes around I’m usually finishing up & getting everything wrapped up for the day that I tend to forget to create a post. So I’m usually hurrying to snap a photo of my recent work before the sun goes down or finding something to share that it takes me away from my “wind-down” time I like to spend with my love & creating “off-the-clock” pieces.

Jewelry Designer
Freedom Method Challenge Day 10!

Today’s the last day of the #FREEDOMMethodChallenge hosted by @flourish_thrive! I’ve had so much fun documenting my life as a jewelry designer/small business owner! Today is about doing something I love!
>x<>x<>x<>x<>x<>x<>x<>x<>x<>x<>x<
I LOVE to create jewelry! I’d be lying if I said I loved doing anything more other than what I do. I’ve been expanding into copper metal jewelry & its just been so much fun! Today I’m sanding down a piece of copper wire so I can attach it to a crystal & electroform it to make a cute pendant. Other little tid-bits; I love spending time with my boyfriend whom I love with every ounce of my soul, I love hanging out with my handsome cat Icarus, I love eating healthy, I love expanding my consciousness & experiencing different people & culture. There’s so many things I’d still love to so ill just have to wait & see how my life unfolds!

Please subscribe & follow to receive updates of new blog posts! Did you participate in the #FREEDOMMethodChallenge? Please share your Instagram link below!

Jewelry Collaboration with Biomorphics & Pineal Vision Jewelry

Copper Electroformed Star Tetrahedron Sacred Geometric Pendant Hemp Necklace.

Hey everyone! Today I’m excited to show you all the process of my first collaboration with another artist! I met this amazing artist on Instagram, Jamie, who runs a shop on Etsy called Biomorphics. He creates jewelry, organic clothing & sacred geometric wall stencils & vinyl decals using different processes consisting of laser cutting/laser engraving, electroforming and metal casting & screen printing! Visit his shops About page here. I believe he will also be dabbling into 3D printed jewelry soon! You really just have to go visit his shop & follow him on instagram here.

I could go on & on about this artist but I must show you what we created! So he offered to do a collaboration with me, & after seeing & following his work for some time I was stoked! He created this stunning Star Tetrahedron Sacred Geometric pendant made of copper carefully electroformed over 1 5/8″ x 1/8″ lasercut reclaimed plexiglass. It was the most coolest thing I’ve ever seen, let alone work with! Below is the process of electroforming copper over the lasercut plexiglass.

Copper Electroforming Jewelry
This is Biomorphics electroforming the lasercut plexiglass pendant in copper. SCIENCE!

What is copper electrogorming, you may ask? You can electroform/electroplate using metals such as silver, gold, platnuim, zinc, copper, nickle & more.An article on explainthatstuff.com says “Electroplating involves passing an electric current through a solution called an electrolyte. This is done by dipping two terminals called electrodes into the electrolyte and connecting them into a circuit with a battery or other power supply. The electrodes and electrolyte are made from carefully chosen elements or compounds. When the electricity flows through the circuit they make, the electrolyte splits up and some of the metal atoms it contains are deposited in a thin layer on top of one of the electrodes—it becomes electroplated.”

Once he was finished with this process he sent it over to me in Florida where I started on the knot work!

Creative Process Jewelry Making
Creative process!

I was really inspired by the triangle shapes & straight lines in this pendant so I drew something up in my notebook & started knotting away! The design looked great on paper but I notice, after knotting a few triangles, that the hemp wasn’t stiff enough to hold shape. It looked OK in my hand but once I knotted the necklace part then tried it on it was a no-go. The necklace chains were pulling up in the shapes making them warp so it didn’t match the triangles in the pendant anymore.

Sacred Geometric Star Tetrahedron
The perfectionist in me did not like how this design was holding up.

This design was not my usual style but I thought I’d try something new, it’s a cool concept but the shapes just didn’t hold up well with the fiber. “You never know unless you try.” So I did what all macrame artists dread to do & I snipped this design off down to the wrap. I was happy to save that part, heehe! So now we’re back to the starting point…

Hemp Fiber Wrapped Copper Star Tetrahedron
Back to square one. I’m determined to match the awesomeness of this pendant!

OK, so this time I drew up something more my style. I’m glad I did cause I wanted my style to show through instead of making something that folks wouldn’t recognize as my work. Plus it’s a collaboration piece so I wanted my best work to show through. In this next design I wanted to complement the pendant instead of “adding” onto it.

Copper Star Tetrahedron Organic Hemp Necklace
Voila! This is the finished piece!

I was so happy with this design, I literally couldn’t stop looking at it & how it complements the pendant so well! Even though there’s contrast with the swirly lines in the knotwork compared to the straight geometric shapes in the pendant, the whole thing flows nicely since I added the antique copper seed beads to tie it all in. I added a long braided hemp chain with a sliding wood bead for adjustment then knotted the ends to insure security. That’s all she wrote!

This piece is now available for sale! You can find it at Biomorphics or at Pineal Vision for just $60 + s&h!

Copper Electroplated Star Tetrahedron Hemp Micro Macrame Necklace.
Copper Electroplated Star Tetrahedron Hemp Micro Macrame Necklace. (That’s a mouthful!)

Have you ever worked with electroplating with copper? I’d love to know your story, please comment below! Did you like this blog? Please Follow me! Want to see more? Please subscribe & get my blogs straight to your inbox!

Until next time, much love & cyber hugs!

XoXo – Brittany Witt – Jewelry Designer – Pineal Vision Jewelry

Like us on Facebook! Biomorphics Pineal Vision